Showing posts with label dyeing. Show all posts

Monday, August 13, 2018

So many things to do


Well, it has been rather busy here since I last posted. My brown jumper is now complete, although it is still too warm to wear it just yet. At least it will be ready and waiting for me when the cold weather does arrive.


There has been a lot of work done knitting the scrappy cardigan. I have completed the left sleeve , both fronts and am now working my way across the right shoulder. This will be a really cosy cardigan once it is complete.


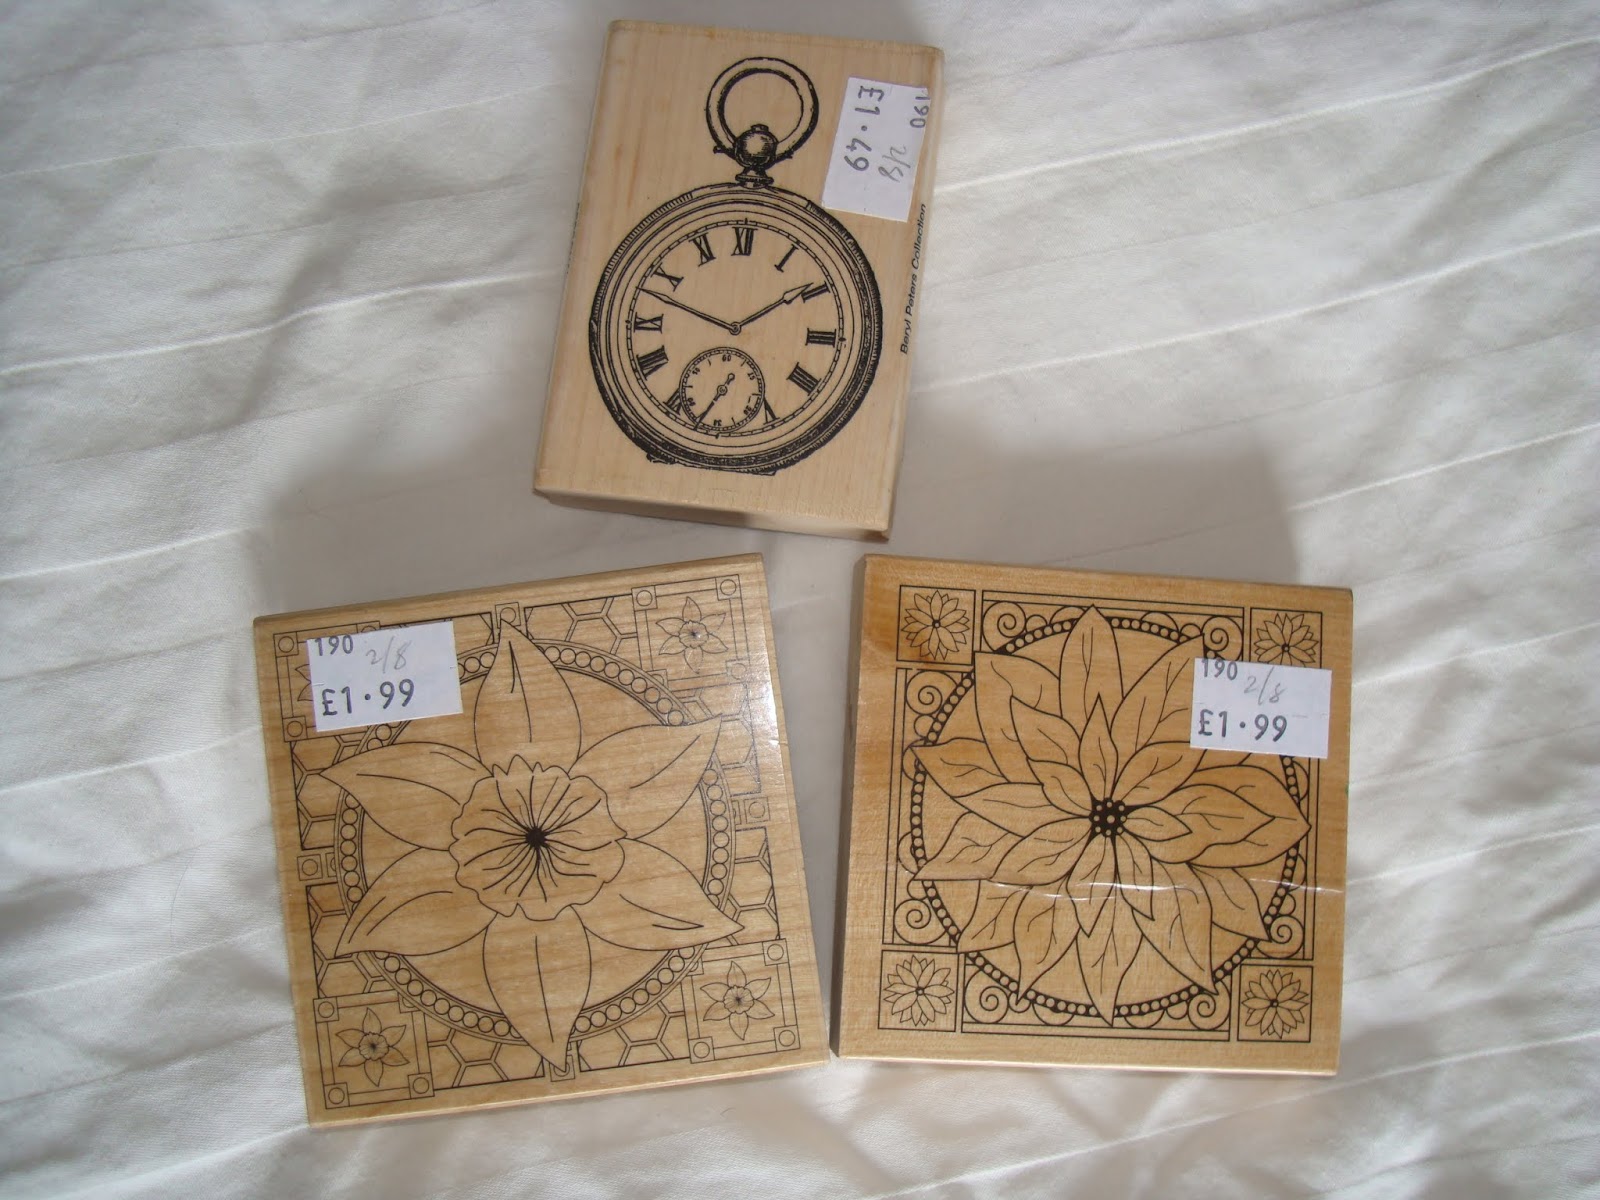
I found these three stamps going very cheaply in a local charity shop a few days ago. I don't usually do any paper crafts, but these will be interesting to work with. I'm going to experiment and see if they will print on my collection of dyecatchers since are very similar in texture to paper.


These three pieces were completed at a recent NWCQ workshop where we were making postcard sized landscapes using scraps of fabric. These have been free machine embroidered using variegated threads. I am not sure exactly what I will use these for just yet, but will not be sending them through the post since I feel they are rather too dull. I will probably add to these to make larger pieces.


Walking into Aldi a few days ago, I discovered a series of these packs. There are five different dyes contained in applicator bottles ready to be filled with water and used. I couldn't resist, picking up this pack. It contains yellow, lime green, leaf green, brown and black. An interesting combination of colours.


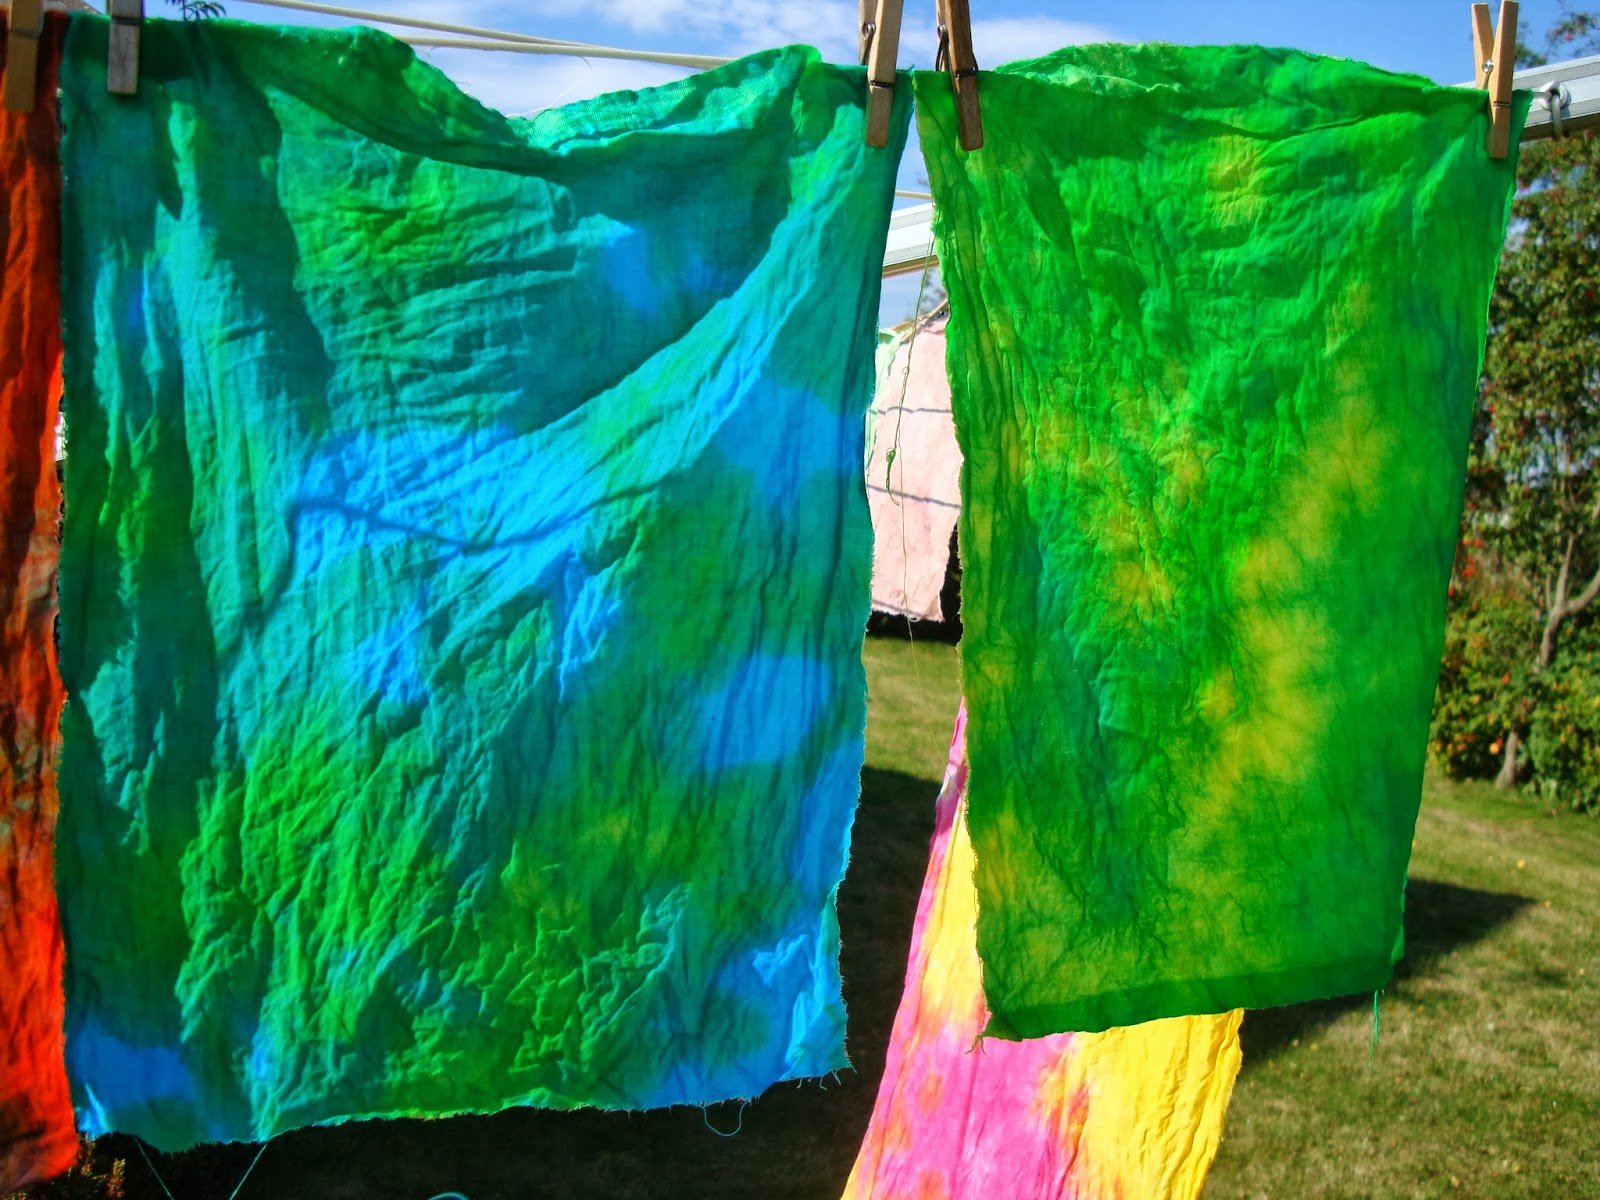
Yesterday, I prepared 3m of calico. After washing the calico I tied rubber bands around sections of the fabric pleated other areas using bulldog clips. I had a lot of fun applying the dyes. This morning the fabric was ready for the next stage - rinsing out the excess dye and then a gentle washing and a final rinse. The fabric is now drying on my indoor washing rack.


The colours may well have been rather more intense had I added less water to each bottle, but I am rather pleased with the results.

I worried myself the other day by listing all the projects I would like to complete in the next week or so. There were fifteen in all. One needs to be completed by Wednesday so I really must get on with that first. 

Monday, March 21, 2016

Felt making and dyeing.

The past two weekends have seen me taking part in very different workshops.

The first of these was a workshop with Edwina MacKinnon. Here we dyed with indigo and also Potassium Permanganate. This gives a delightful brown shade which goes well with indigo.

Dyeing samples drying on the grass.
We had to leave the samples to dry for a week before rinsing out. As you can see, my samples were wrapped around sticks, clamped with bulldog clips and rubber bands. I tried some Shibori too (the 
fabric is stitched and the fabric gathered firmly before dyeing.) All this was great fun.
Dyeing samples after being unwrapped and rinsed.
The fabric was eventually washed out yesterday and hung out to dry on my washing line. I have still to iron it and put it all away. I think my favourite has to be the blue and white piece to the left of this photo. This was the cotton piece which  I have bound up with bulldog clips. You may see some brown marks on the cloth. These occurred because a couple of the bulldog clips decided to start rusting. Really interesting results.

Turkish felt.
I had some fun during the week playing around trying to make another piece of Turkish felt. This was the result. The fibres used for the back are all orangey brown and yellow. The fabric was first rust dyed before being used for the felt. It really wasn't a very good piece of rust dyeing, so I was quite happy to use it here. It hasn't felted quite as well as my first attempt, but I am quite pleased with it.

broken crockery and tiles
Taking Ella for a walk, I found some really lovely pieces of broken crockery. I couldn't resist picking these up since I could see some possibilities for their use.

the reverse of the same tiles and crockery pieces.
I found the reverse sides just as interesting as the coloured tops, especially those printed marks. These may well reappear at some time in the future. I haven't quite decided how to use them yet.

Felt made using bits and pieces of discarded samples.
Last Friday, I went along to Friday Felters where we made felt to make into twiddlemuffs for alzheimers patients. I am not sure that my piece is going to be good enough since it would need rather more elements to fiddle with. I will need to play with this piece rather more.

Following Friday's felt making session, I returned to Frodsham, once again for another feltmaking workshop. This time it was with the International Feltmakers Association. We were making felt using prefelts, pieces of partially felted fabric. The pattern was based on a skyscraper scene which we were given to use. Pieces of prefelt were cut to shape before the whole piece was felted onto a background of wool tops. 
My skyscraper scene
As you can see, I had a lot of fun playing around with colours. It still needs a little bit of finishing off, but I am really quite pleased with this.

Thursday, August 13, 2015

Experiments in printing and dyeing.

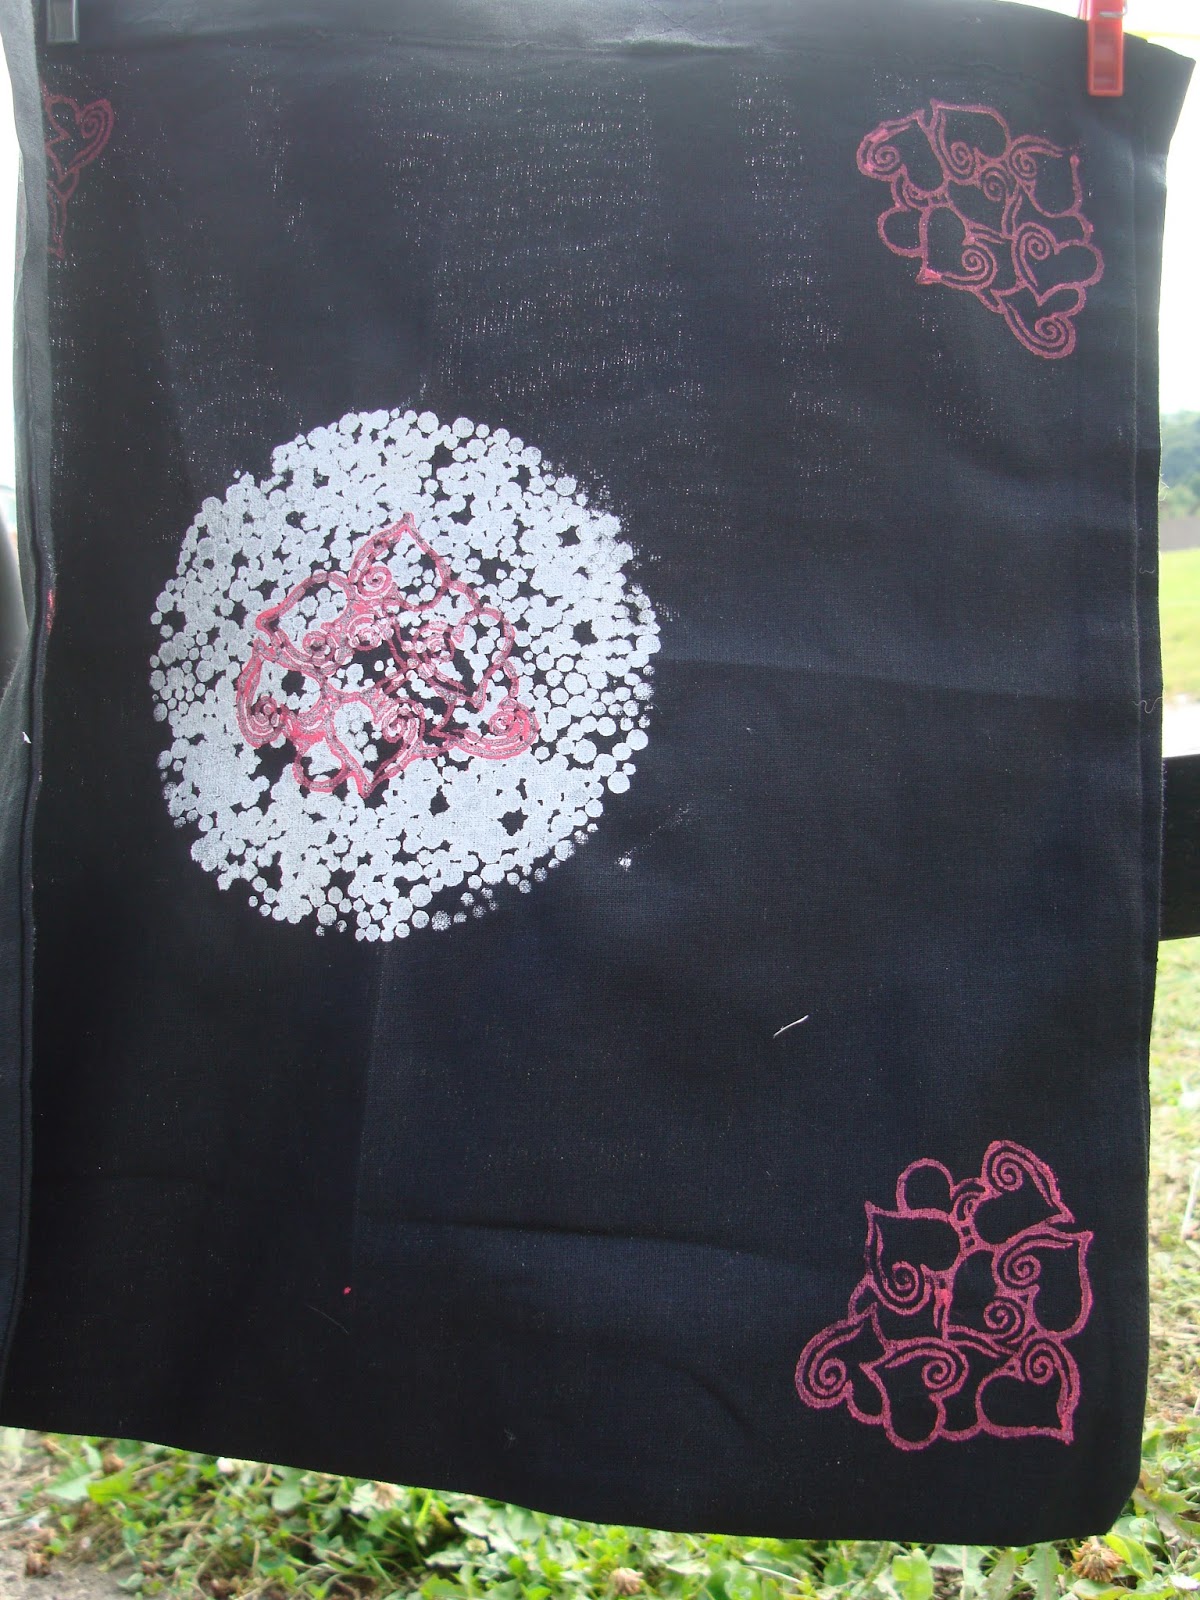
Printed calico bag - inverted
I've been busy since I last wrote. Firstly, I was involved in a delightful printing workshop. This was such fun. We were printing bags ready for the Festival of Quilts. They were donated to the Tombola which raises funds for The Quilters' Guild of The British Isles of which I am a member.


Printed bamboo bag - correct orientation

Printed black calico bag - correct orientation
We could each buy three different bags - two were calico, one being black. The third was a little more unusual, being made of bamboo. I must admit to having preferred the calico bags. I brought six extra bags home with me to print as presents. The three shown will be, by now, with their new owners since I donated all three bags which were completed on the day. The photos were taken as they dried on a washing line.

Last Friday I was really lucky and went to an Introduction to natural dyeing with the Frodsham Friday Felters group. We travelled to North Wales and visited Helen Melvin in her fascinating Blaen Wern Dye Garden.

Rhubarb root (Rheum sp)
The photos you see here are the wet samples of the different dyes we tried as they waited on the draining board in my kitchen. I shall post photos of the rinsed and dried samples in my next post.

Japanese Indigo (Persicaria tinctoria)

Persian berries (Rhamus sp with rusty nails)

Helen's dyed wool - fermented Alder Buckthorn

Alder Buckthornm (Frangula alnus)

Cochineal (Dactylopius Coccus)

Logwood

Dyers Greenwood (Genista tinctoria)


Madder (Rubia tinctoria)
It was really interesting to walk around Helen's garden with her commentary on what each plant was and the colours that could be achieved using different mordants. Different parts of the plants were used - dried berries or roots, or fresh leaves (Japanese Indigo). All dyebaths, bar the Japanese Indigo, were prepared by Helen before we arrived so that we could make the best use of our time with her. I was able to help collect the leaves and liquidise them ready for use. Since I had forgotten to wear gloves, my nails were a rather nice shade of turquoise by the time I had finished.

The last photo shows the bodice I have been making. I am intending to print and paint the dress while it is in two pieces - the as yet uncompleted bodice and the skirt. The skirt has still to be assembled.
The almost finished bodice
You may have seen the pattern photograph in my last post. You can see it here.

Saturday, December 07, 2013

Natural colours and having fun with dyes


Colours around my garden
I really should have written this post a couple of weeks ago, but I found myself far too busy to post anything here. These photos were taken on the 17th November, they day after I had been on a dyeing day with the Weekend group. This group is really called "Textiles without limits" and they have a blog which can be found here.

Walking around the village

Going for a walk with Ella - just look at those legs!

Colours around my garden
The dyeing session was huge fun. Many of the other members of the group had been to a previous session where they had been doing some shibori - preparing fabric ready for dyeing.

My collection of freshly dyed fabrics
I hadn't been able to go to that meeting, but I was able to try out some of the ideas since Leah had given us a link to an amazing blog called "And then we set it on fire". I copied some of the ideas there to try out with my own fabrics. As you can see I did get through rather a lot of fabric, to say nothing of bulldog clips, those clips used to clip on freezer bags, string and washers. I had a lot of fun and will share the before and after photos in my next Blog post. 

Sunday, September 29, 2013

Dyed fabric.

Pale colours

All the following photos show my fabrics drying on the line after being washed and removed from the packaging. These freshly dyed fabrics were completed during the Dyeing Day lead by Sandra Wyman last Thursday. It was such fun!

Shibori before I removed the string and container

Shibori being washed

The fascinating thing about my Shibori experiment - tying fabric around a shape and crushing this down before dyeing - was that the yarn I used for tying the fabric has also stained the fabric it touched addin a really interesting pattern.

Parfait dyeing
Not my usual choice of colours, but this bright piece is great fun.

More parfait dyeing
I find it amazing that two pieces of fabric dyed together can be so entirely different.

Allowing dye to find it's own way
These four pieces of fabric were dyed in teh same tub with dye being added after each piece of fabric was scrunched into the pot. I just love the way the colours have come out on these.

Mixing two colours - red and green.
The colours here are just so vibrant. I shall really enjoy having these pieces in my stash ready to use.

allowing blue dye to wander and find it's own way

These fabrics were all dyed together another parfait experiment.
This collection is a mixture of cotton, silk prepoline, and silk velvet. The silk velvet is the amazingly marked piece between the sheer fabric and the blue.

Mixing two colours - purple and green

Overdyeing with black
If anything didn't work, it was this piece. However, as it continued to dry, the colours changed again. I shall photograph these pieces after I have ironed them. The small piece is a piece of viscose satin, which has taken the colour really intensely. These will be wonderful bases for a printing session.

Friday, September 27, 2013

Catching up with sewing projects.

The past few weeks have been very busy. First, I had to remove the old cover on my small printing board. It had just got to the end of it's useful life and I was due to go and help out with the crafts at a birthday party last weekend. I had offered to teach anyone who wished ti have a go, to print on fabric.
My old cover for the small printing board.
It was quite interesting. I only ended up with a couple of people actually wanting to have a go, but quite a number coming along to look and see what I was doing. I had taken all my fabric paints, printing blocks, thermofax screens and a lot of fabric. One man was really taken with the idea of printing that he spent some time with me and was delighted to take away a carefully decorated piece of fabric. Sadly, I just did not take any photographs, I just didn't have enough hands. You may be surprised to hear that this was a friend's 50th birthday party, and it all took place in her garden. The nice thing is that she had a go too and gave me a lovely bouquet of flowers.

September challenge for the Sky's the limit group - "Change".
Last week was filled with completing challenges ready for deadlines which were looming. The first to be completed was the chameleon on my Sky's the limit piece. I still am not fully convinced by this piece, mostly because I made a mistake with the stomach area and had to add a piece of fabric to cover a piece which was really far too dark. I feel this needs much more work than I can do at present. What do you think? I call it "Change, alter, adapt". It is calligraphy using up my old fabric dye pens which were drying out over a dyed piece of fabric made some time ago. Over this is a piece of scrim which has then had a bobbin work drawing stitched in place. The whole piece has then been quilted onto a wadding base.

For Wednesday, I had to complete my last piece for the Chinese Whispers challenge. This has been going on since last September, but I haven't been able to post about it before now.


The original photo - underneath the Tay Road Bridge, Dundee, Scotland.

It all started with a photograph. I took this during the Quilters' Guild AGM and Conference held in Dundee, Scotland in May 2012. It is a view looking through the pillars of the bridge. I was very lucky with the light conditions on the morning I took this photo. It had been extremely foggy earlier on.

My piece based on the Tay Road Bridge.

I must admit that I wasn't very happy with my own piece, feeling it is just too simplistic. However, at the time I just didn't have the time to make a more complex piece. I feel it would be wrong of me now to replace this piece with something else since my next challenge now that I have had all the pieces back from everyone else taking part in the challenge is to make a book with all the pieces I have. Hmmmm.

Chris' piece - designed from my textile piece.
I passed my textile piece on to Chris. We had been instructed to pass everything on to the next person hidden in an envelope to hide it from everyone else taking part in the challenge. We would only be allowed to see all the pieces at the end of the challenge.

Chris' note attached to her piece reads, "I found this quite difficult to know what to follow on with at first. However, two things came to mind - a ploughed field and a wooden door, or floor. Decided to use the pattern I had for a foundation pieced house and make the door of wooden slats!"

My main difficulty was that Chris' house was landscape in orientation and not portrait. However, that adds a rather interesting challenge in itself.

Mary's piece - designed from Chris' piece.

The next piece came from Mary who made this enchanting quirky castle. She had only seen Chris' foundation pieced house, so her block is also landscape in orientation. She wrote, "The log cabin reminded me of a house and an English Man's House is his castle so I did a quirky fairytale castle in applique."

Bernice's piece, designed from Mary's piece.
Seeing only Mary's design, Bernice completed this piece. She wrote, "The castle that Mary passed to me caused me to think of knights of old. Then when wondering how I cold depict my thoughts, I came up with the idea of making it a fun picture just suing simple applique techniques."

Brenda's piece designed from Bernice's piece.
Brenda wrote, "After seeing the crusader with such an aggressive stance it conjured up ideas of what or who he had rousted. So we had to have a knight fleeing on a horse to gain the safety of his castle."


Rosemary's piece designed from Brenda's piece.
 The last piece to be completed was Rosemary's. She had organised the challenge for us all and kept us to time as well. Not easy since we met every other month to exchange pieces. Each time we each had a piece for someone else's Chinese Whisper. In my next post I really must put together the photos of the pieces I made for each of the others involved in this project.

Going back to Rosemary's piece for me, she wrote "The picture is of a castle in Guimaraes, Portugal. We went there on th last day of our holiday. The figure is D. Alfonso Henriques. He won the battle of Sao Mamede which paved the way for the foundation of Portugal. The castle was built to defend the monastery and Christian Community from the attacks by the Moors and Normands, so I decided to use my holiday memories as a basis fo the Chinese Whisper piece. It is hand stitching on appliqued background with the knight on a separate piece of the applique fabric stitched in place by matching the background stitching."

As you can see each piece is a superb item in it's own right, all very different and now my challenge is to make a book which will retain the quality of each of the pieces I have been given and yet will make a book which works as a whole piece in it's own right. Not easy!

Thursday brought a very different day. I met up with other members of NWCQ and we had a wonderful day of learning different techniques of dyeing.

Freshly dyed fabric waiting for me to get around to washing it all.

Our teacher for the day was a good friend, Sandra Wyman who is an expert dyer and great fun to be with. I was extremely saddened to hear that she too had lost a very dear furry friend very recently. She wrote a very moving post about the loss of her dear cat. Do go and read it.

Now all that is left for this month is for me to complete my Journal Quilt for September - it has been started and just needs to have the stitching completed before it is ready for posting. Then I must get on and wash all the fabrics which I had such fun dyeing yesterday. Thanks Sandra.