Showing posts with label textile workshop. Show all posts

Monday, October 15, 2018

Textile experiments, dressmaking and MME

Samples made at Anne Davies' "Stitch, melt,distress" workshop.

I was lucky enough to be able to attend a workshop with Anne Davies at Wilmslow Guild on Saturday. It was great fun to play with Tyvek, Lutrador and Kunin felt, soldering irons, irons and heat guns.


I have started to pair my samples with previously printed fabric samples. This sample above was first printed using one of my own designed themofax screens onto a rust dyed piece. I am still considering what processes to use next with this one. This distressed sample was made from two pieces of painted Tyvek free machine embroidery added before the distressing process. I've used an iron and then heat gun so far.


I'm experimenting with this thread for my T-shirt project. At present I have got as far as fastening the back and front together at the shoulder and will be starting to add the neckband next. There have been a lot of other projects getting in the way since my last post. I managed to complete two out of three pages for the Pinfold book challenge. The third is under way, but will have to wait for the t-shirt to be completed. I have cut out a pair of trousers which will be next on the list. A warm pair of trousers will be needed very soon, especially when walking the dogs.


The test knitting has been started, ripped back and started again. This is the neck and shoulder section. Yes, that neck section does fit over my head and around my neck. The next section will find me splitting the body from the armholes. I rather like the effect of the neckline on this design.

 During the week, I found this piece of faux slubbed silk. It seems to be some kind of synthetic, but I can't yet name it. The fabric is shown just as it was waiting to be rinsed out after washing. I plan to use it as the backing for some more cushion covers I need to get on with for the Moulton Sewing Group. These will end up being sold on their Craft Stall in December.


The embroidered designs which will become the centre pieces for the cushions.


The fabrics shown above are all furnishing weight fabrics from my stash which will become covers for the cushions. I am now on the lookout for suitable piping and edgings.

 The Me Made Everyday continues. I haven't bored you with the details of the past week. Suffice it to say that I have now taken the heavier weight clothing out of the loft ready for the cooler weather to come. I find myself wearing more trousers than skirts or pinafores so far. However, I do think that the trousers I currently have available are going to be rather too thin for the winter weather to come. Hence my mention of the pair of trousers I have cut out and have standing by ready to sew. These are going to be made from the lovely needlecord I showed on my Blog last week. I really do need to organise my time a little better so that I can get around to making these rather more quickly than seems to be my lot so far this month. Ah well, as one friend put it some years ago, "Life gets in the way sometimes".

Elements from my wardrobe worn for MME (Me Made Everyday) this past week: all three pairs of my Hot Patterns Weekender Cargo Pants, warm grey culottes from a Burda Style pattern, three polo neck tops, a sweatshirt, my Cocoon Jacket from Sew Different, both Breton tops, a knitted waistcoat and a thick blue knitted cardigan. Having useful layers has been helpful this past week with the weather being so changeable.


Monday, April 16, 2018

Stitching by hand


It has been a really interesting week. Work has continued on the shed, but I managed to attend the meetings of two textile groups. The first of these was Pinfold. The meeting had a workshop from Pauline Mills who showed us how to make "Penny rugs". You can see a really good online description here. Needless to say, I will not be making a proper "penny rug", it just isn't my style. Instead these will turn into the decoration of a fabric "vase" to hold my long rulers and old knitting needles. These currently reside in an overcrowded flowerpot with the longest of my paintbrushes. Hopefully things might get tidier and easier to find........ maybe not.

I just need to think about how to weight the bottom of the "vase" to stop it toppling over.


The fifth pile shown on the extreme right in the first photo was shown without it's flower backing. This is the colour which will be finally stitched in place at some time over the next few days. There are green pieces to be cut out as "stems" before being stitched onto the backing fabric which will be some upholstery fabric found in my stash. The "pennies" are cut out of felted wool. The fabric here was supplied by a friend of mine who brought along a large collection of felted and dyed blankets. Thanks so much Meryl!


Pauline, our tutor was very generous and gave us each three cardboard templates for the shapes. So useful and meant we could get straight on with the stitching. I've used variegated Anchor threads from my collection of embroidery threads. Three strands were used for the buttonhole with the full six strands used for the decoration. (Stamens and french knots). A lovely workshop with plenty of opportunity for chat as we worked. Just what was needed.


I handed over the "Come fly with me" book which I showed last time and picked up this next book. The topic this time is "Round and round". A really intriguing title. I'm letting my imagination go free for the moment as I try to decide what I could possibly make......


During the week, I started to make a few cards with scraps of samples from a rather too large collection. These three need a little more work. As does the one below. This really needs a fair amount of stitching before it can be called a card.


I also received two more patterns in the post. I love this style of cargo pants, but have never found a pair of ready-mades that actually fit me. I really couldn't resist this rather interesting dress and tunic pattern too. I have some suitable fabric in my stash for the dress, but haven't yet decided which fabric would be best for these trousers. I really ought to make toiles of each first......


Finally, on Friday, I met up with another group of friends and Debbie introduced the idea of "boro". I must admit I rather like the idea of handstitching various fabrics together. My version is really not a true "boro", but is inspired by the idea of stitching fabrics together to repair/make another fabric. Mine are strips of raw edged fabrics of various types from my collection of "interesting fabrics", along with dyed cotton bias binding and cotton tape. The pieces are all stitched onto each other and backed by a piece of calico (muslin). This will probably turn into the background for something at some stage. For the moment it is a very pleasant stitching project for the evenings.


Thursday, February 18, 2016

Merrily sewing and printing.

January and February - overprinting in progress.
This week has been rather busy so far. There has been block making and printing as well as the completion of the cushion cover I mentioned last time.
Firstly, the printing and blocks. The design work for these was based on the workshop I went to a couple of weeks back with NWCQ. The group have "Pattern" as their theme for 2016, and I had worked with some leaves preserved since last summer in my flower press. These were quite small - field maple, for example - and I played around with the outlines. In the end I made three blocks all based on the leaf design.

One of my print blocks - based on leaves.
The blocks are made from craft foam, and stuck using double sided tape onto foam board. These were great fun to print with and stood up to the task very well.

March on the left with February - drying.
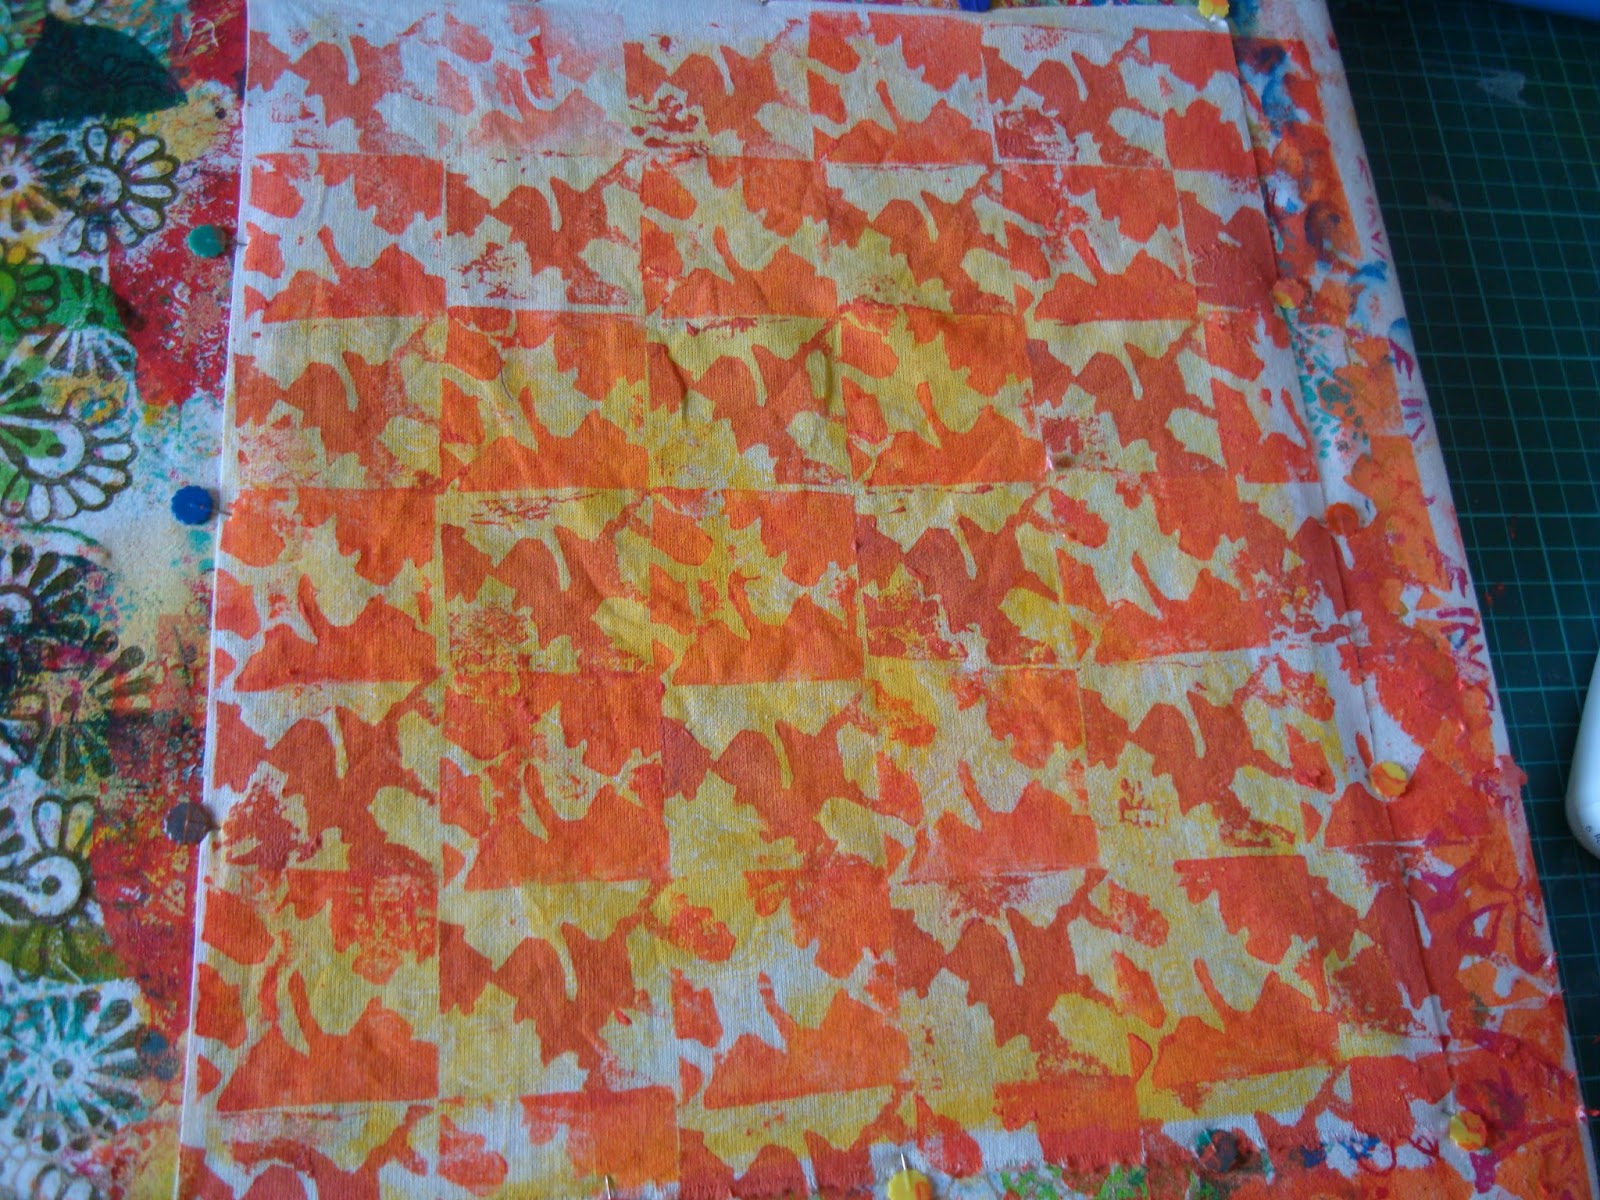
I found it interesting to see the different effects made by the different blocks - one was purely an outline, the others were negative images of each other. The block printing was completed on calico which had already been printed using a gelliplate.

April
My last piece used the two negative blocks on the same piece of fabric. I used two slightly different colours.
Experimenting with printing medium.
What made it more interesting for me, was that I used printing medium with acrylic paints. My fabric paint collection has almost run out and I have been looking for a different method of working. Some months ago, I had tried using the medium in a workshop with Gillian Travis. I found some in Hobbycraft. I did find it rather thick, so added water to get the right consistency for block printing. I haven't used this for screen printing yet. That will have to wait until a later date.
The pieces above will be my Journal Quilts for this year. They are layered and waiting for me to free machine a leaf design over the top. My sewing machine really needs a clean before I can start work, hence my prevarication - writing this blog post instead.

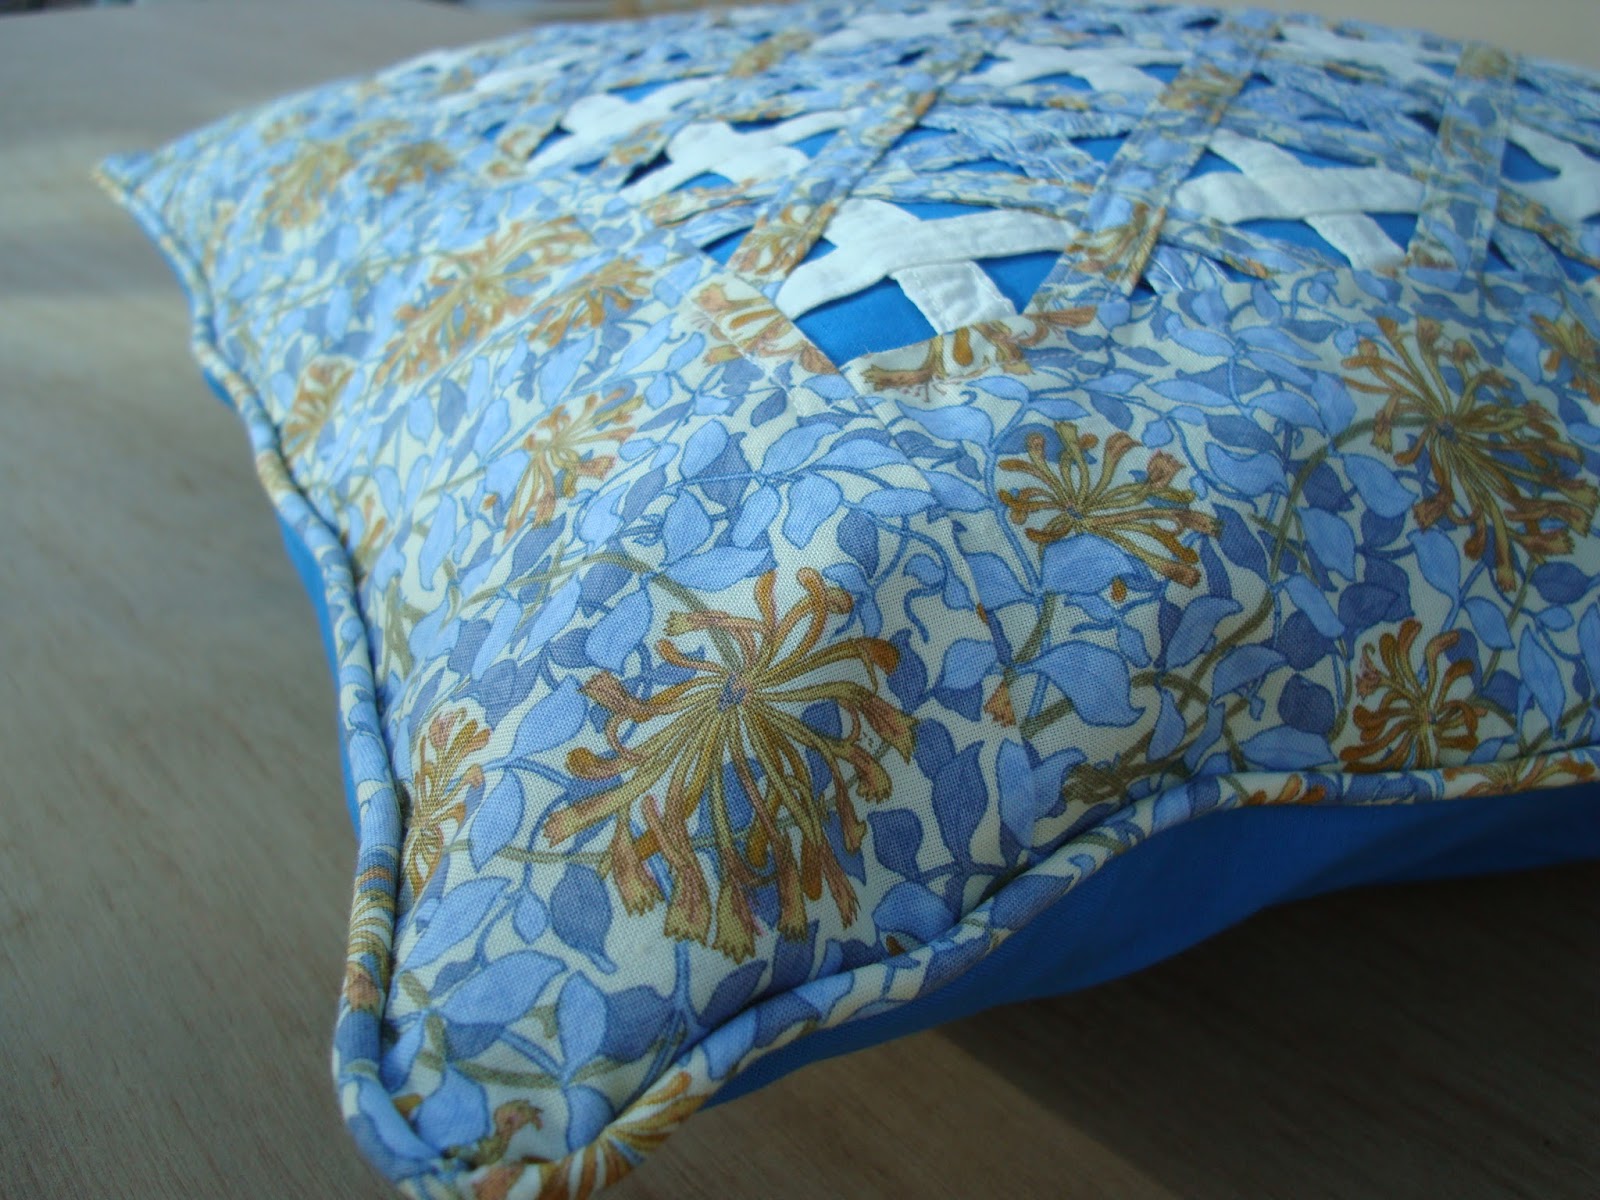
Completed cushion showing piping.
I completed the woven cushion cover and it is now waiting to be added to the collection of raffle prizes for Pinfold. The lining fabric was a piece I had picked up in Ikea, and the cushion has the same fabric as the back. This is an envelope back which means that the cushion inner can just be pushed inside and there doesn't need to be any fastening. I have added piping too, just to finish it all off.

Completed cushion front.
It is quite a big cushion being 20 inches square. Cream calico, the lighter blue fabric is Fabric Freedom's "F435 William Morris Mix", whilst the main fabric is Fabric Freedom's "F433 William Morris Mix".

Monday, February 01, 2016

Knitting, stitching and going to a workshop

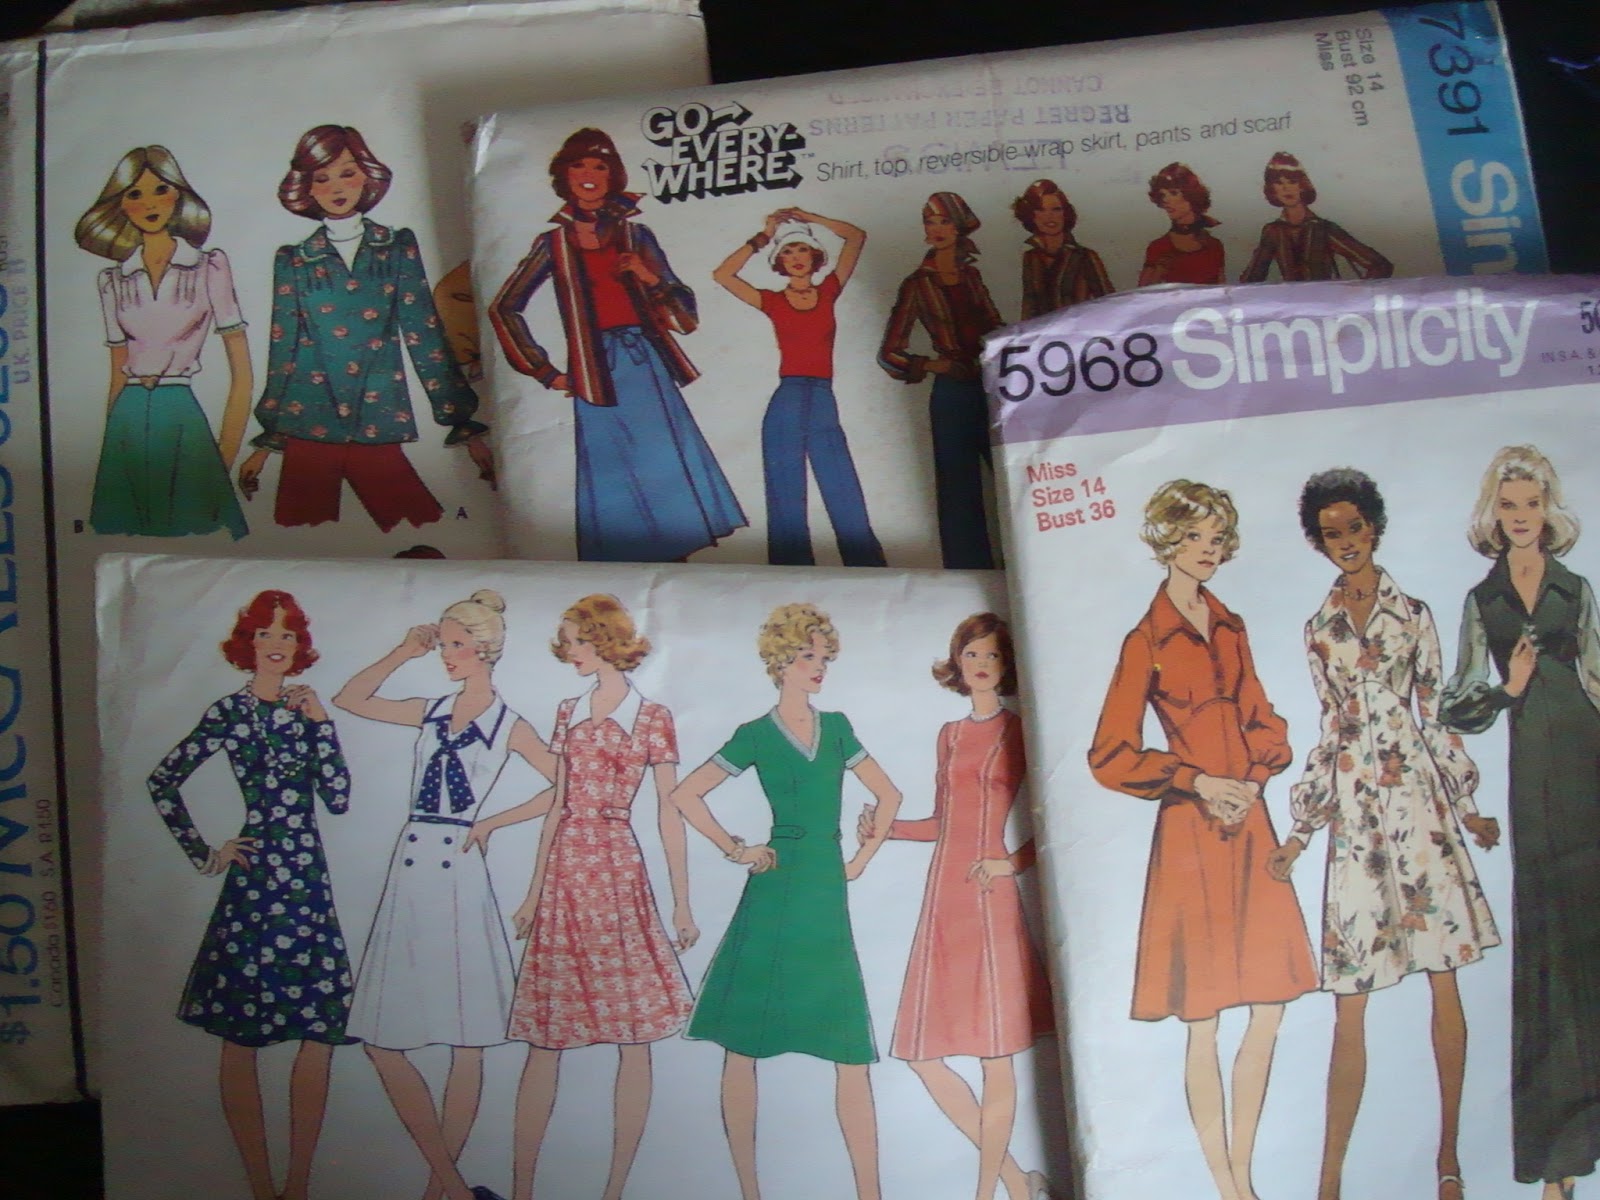
Some patterns I have been given
A few weeks back I was given a small collection of vintage patterns, four of which you can see here. I realised that I had never shown anyone my collection of patterns. I haven't counted recently just how many there are:

Most of my pattern collection

Yes, it is all in sections
The patterns here are the standard sized ones. There are a few large patterns which live in a bigger drawer. They are just too high for this one.

My current project yarn as well as some for the next three projects planned
I've been tidying up my knitting yarns too. This small box lives in the living room alongside the settee where I normally sit. I use it to plan ahead, adding any wools, patterns and other supplies I might need for my current knitting project and also the ones I plan to do next. At the moment, the plan is for these skeins to complete my current jumper, then for a pair of long socks (light brown), and couple of pairs of socks or gloves in the remaining four ply yarns above (all shades of green).

I finished the top, as shown in the last post. Then cast on with this next project from December's "The Knitter" magazine. You can see the design photos from the magazine here. It is knitting up really nicely so far, with only a few rows ripped back. Yes, I always get something wrong somewhere. It is quickly remedied most of the time. In the worst cases, I end up ripping back and starting again.

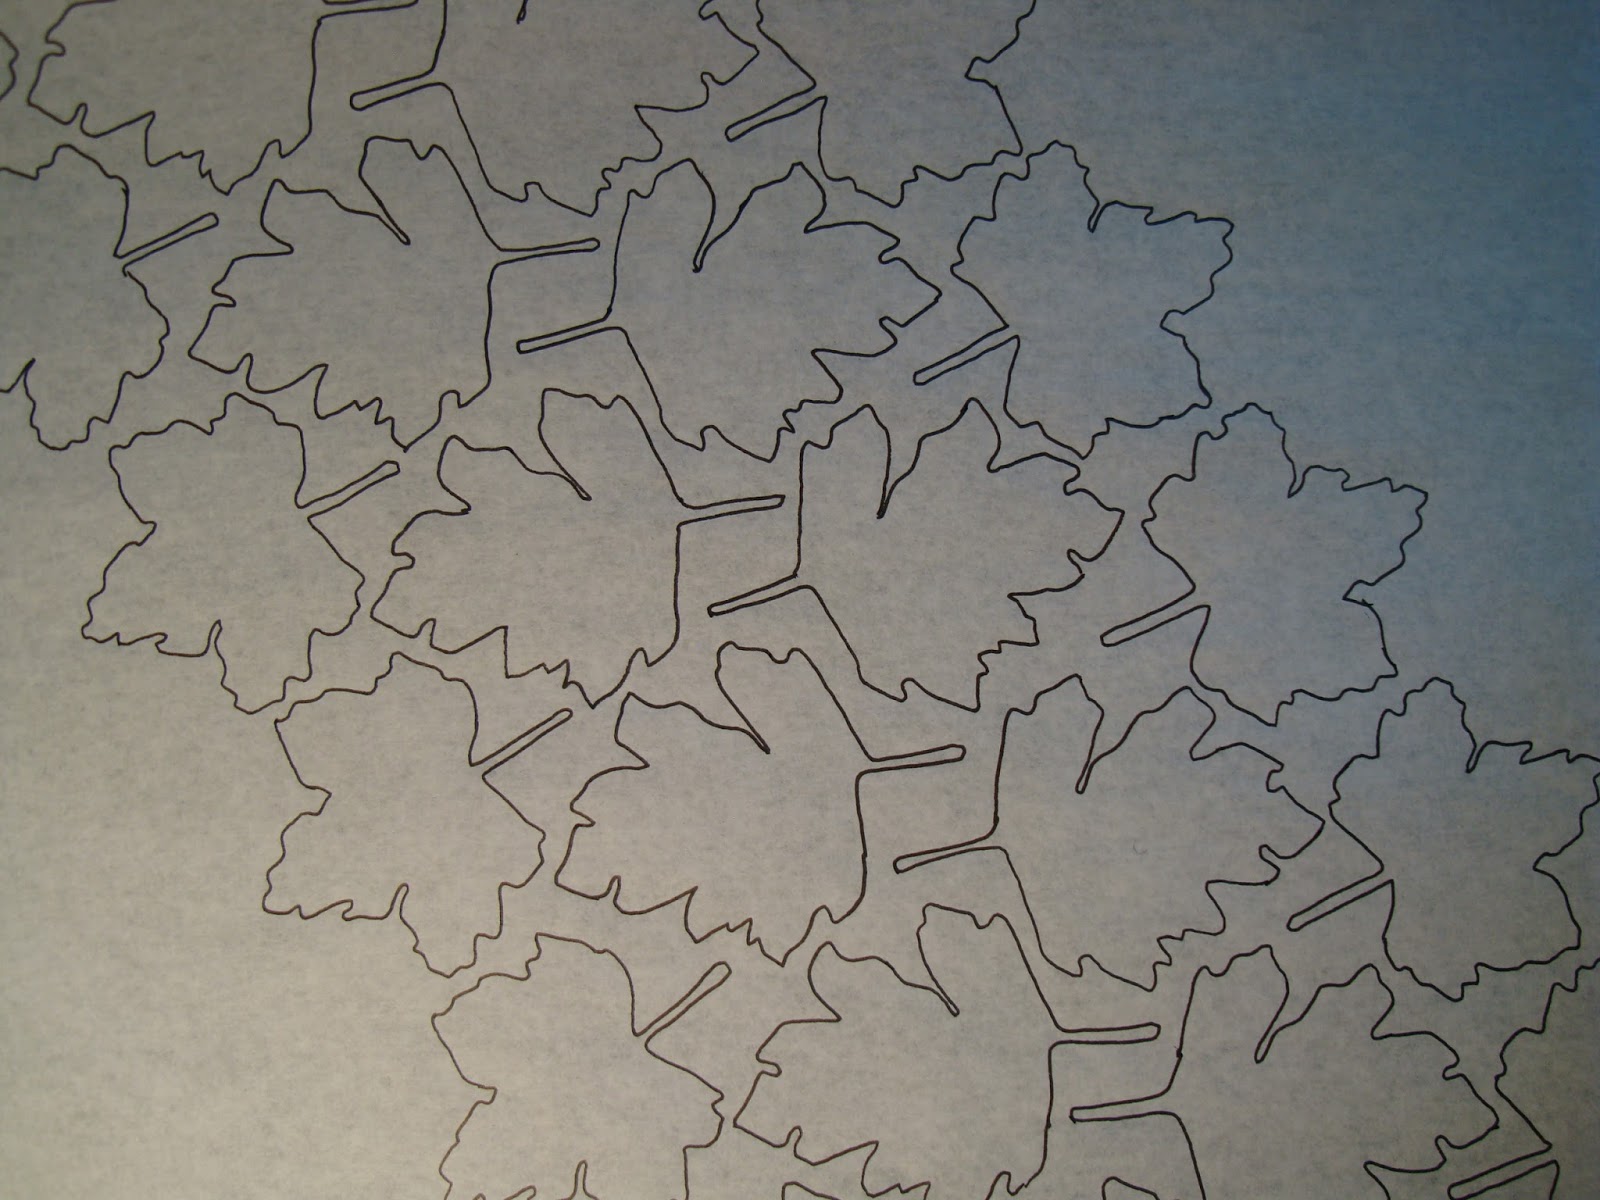
Design ideas - basic leaves
Last week I went to a full day workshop with Judy Fairless. She is a very talented textile artist, and an excellent teacher. She lead the session, giving a wide range of ideas to experiment with during the day. Our topic was "Drawing for Design". A really interesting time was had by all. I started using some small leaves I had brought along, tracing them and developing a couple of block ideas.

Blocks designed from a small section of the design above
A design idea based on the block patterns

More ideas based on the same blocks
I really enjoyed myself and plan to turn these ideas into actual printing blocks before too much longer.


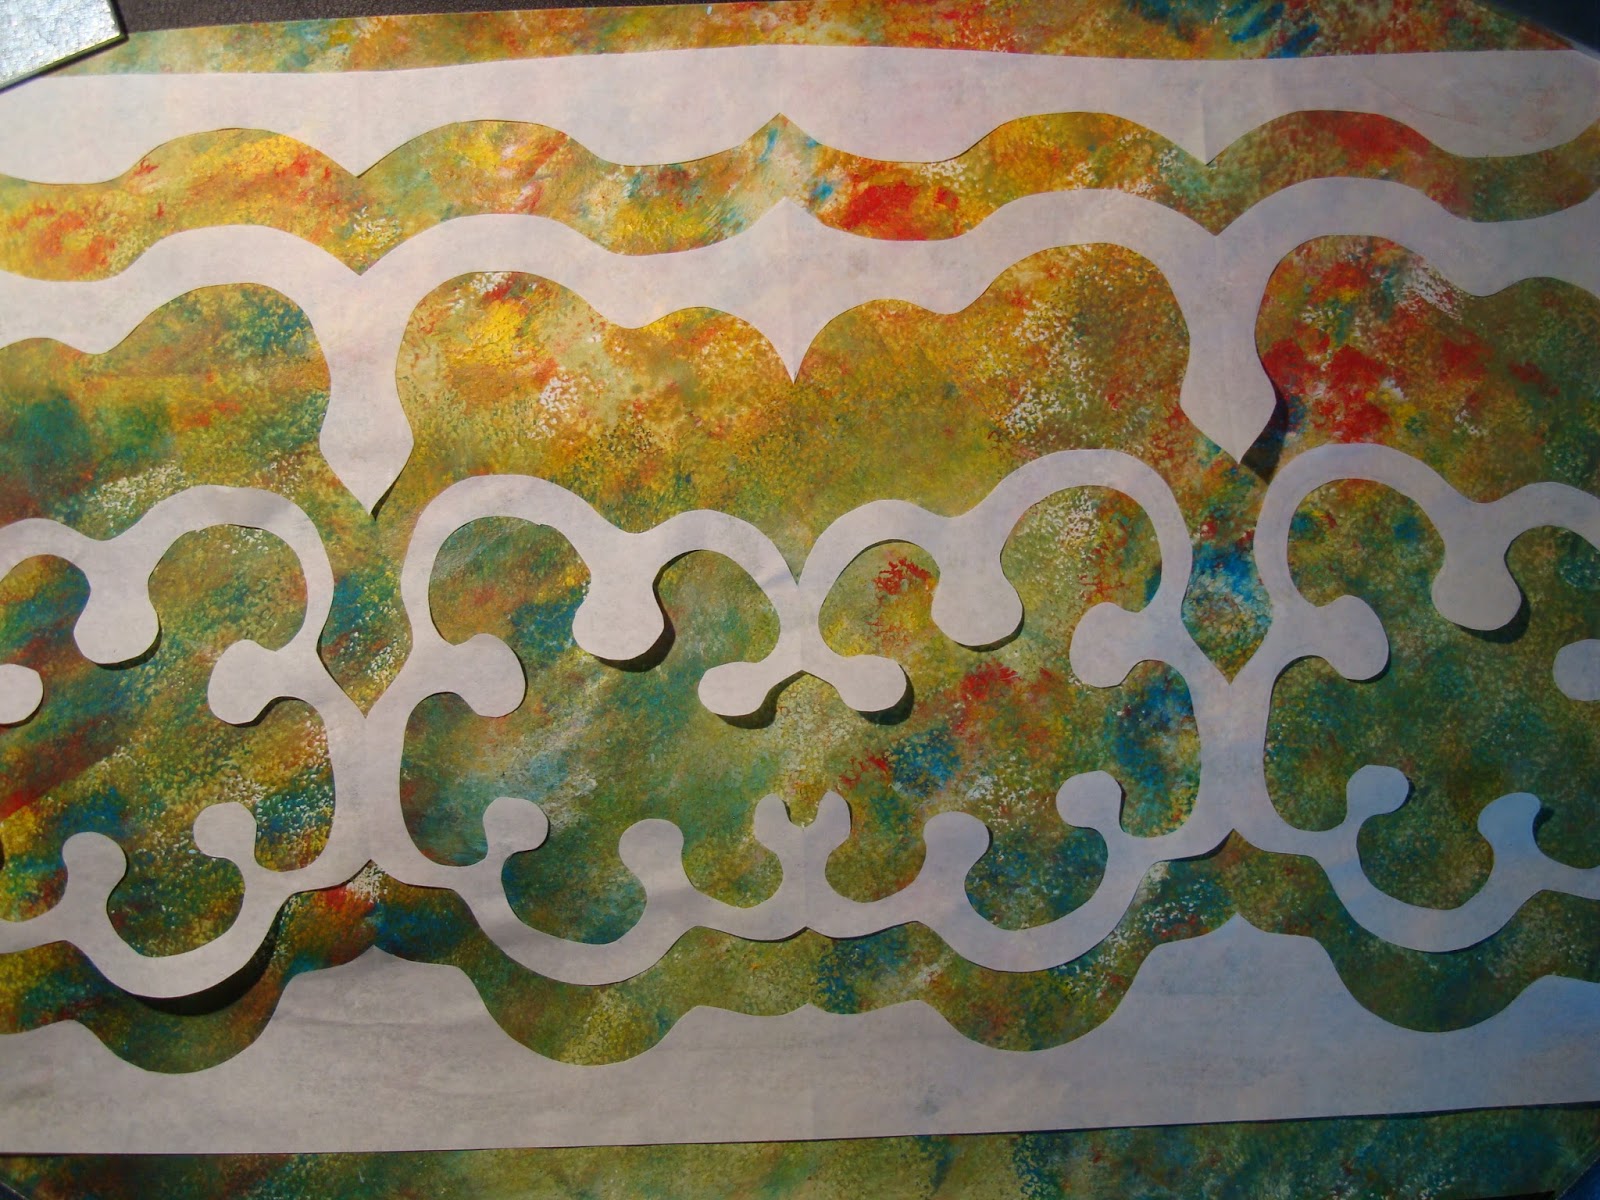
Using cut out paper 
I also made some cut out paper patterns. Instead of using plain paper, I decided to paint some background paper using watered down acrylic paint.

 The background paper

The remaining cut out pieces
Such a lot of fun. It gave me plenty of ideas for a challenge piece I need to complete for next Wednesday. Yes, I still haven't managed to get out of finishing everything at the last minute.

The elements I had taken to the workshop
I had started out drawing the bits of bark (Silver Birch), beech nuts, and beech nut case shown above. However, I really couldn't see any way of getting these items to work for me. I did get a lot out of the workshop and it has taught me a lot about using any drawings I make.
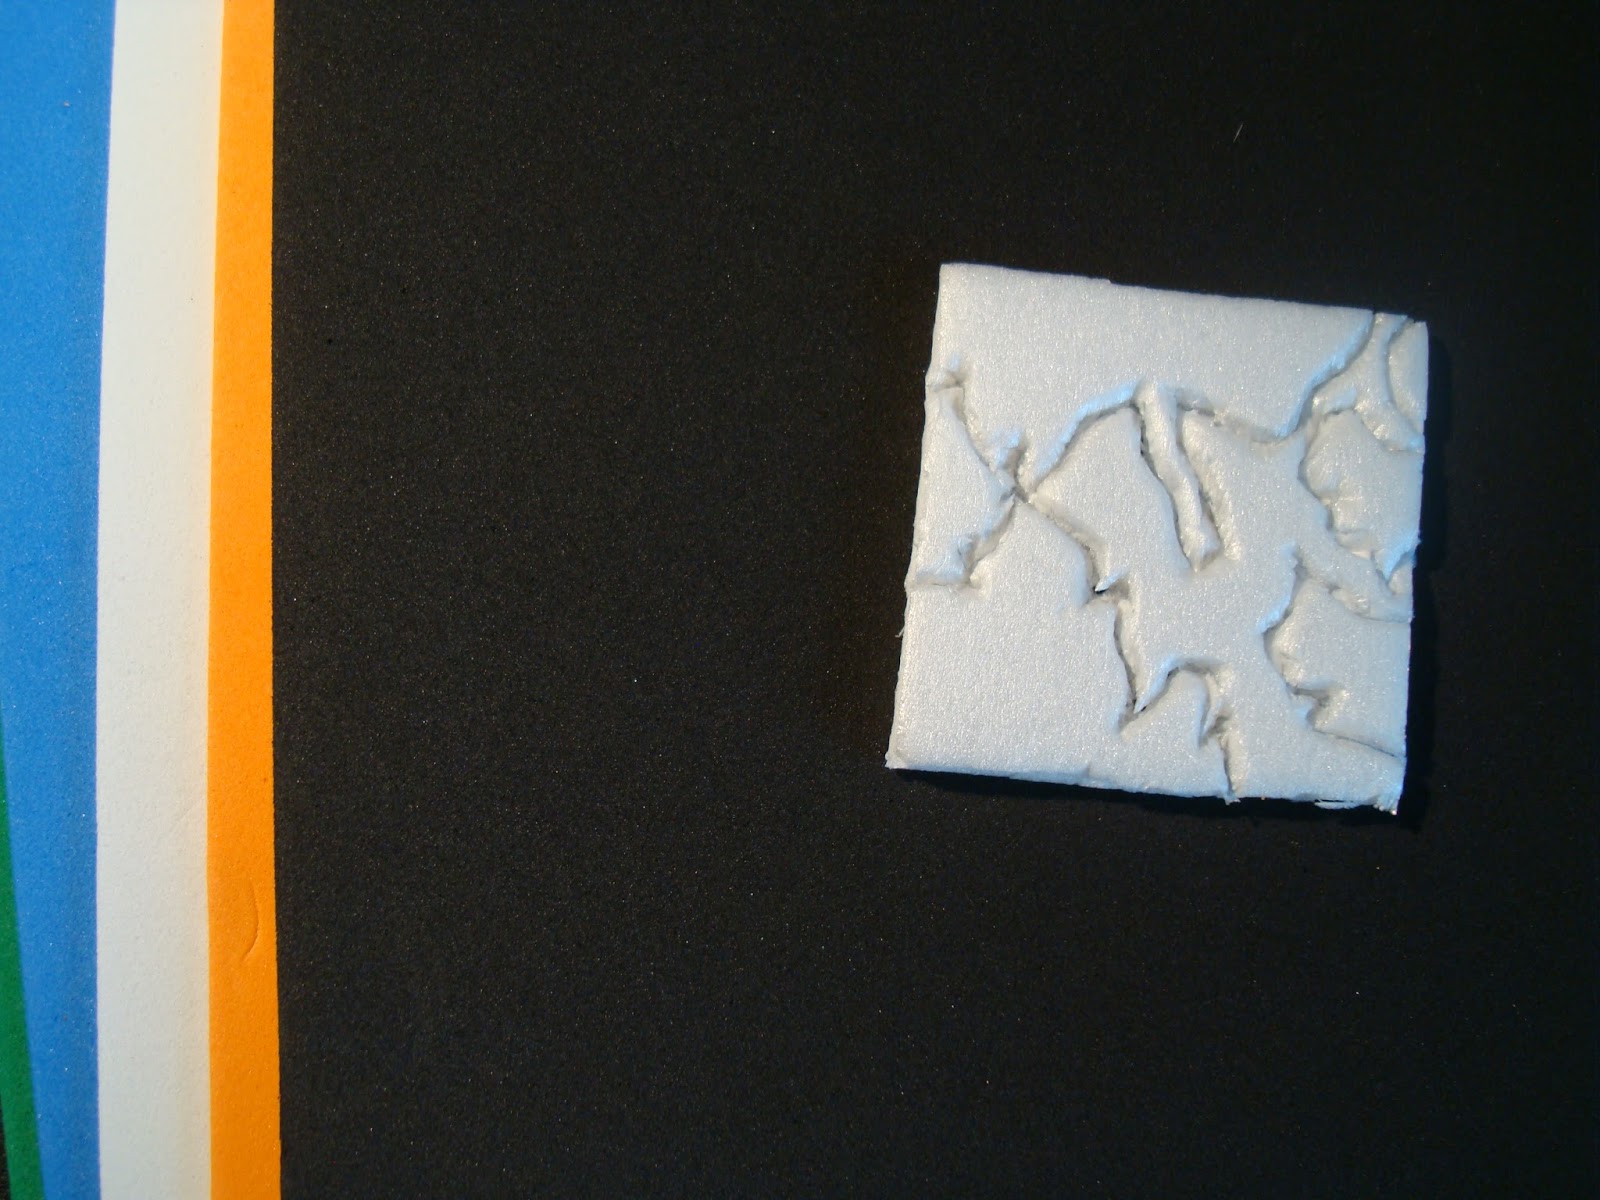
Towards the end of the session, I made an experimental block from pizza packaging - the polystyrene type. Not sure that it will work, but it is worth a try. This one is sitting on a collection of thin craft foam pieces. I intend to make some more blocks from this.

A block made from packaging
Well. I had better get on with things. I have rather too many ideas running round my head at the moment. Sorting out which one to start first is a little problematic. Perhaps working on the ones which need to be finished first might be the best idea. Wish me luck.


Monday, November 16, 2015

Is it possible to have too many projects on the go at once?

Freshly printed fabrics - own dyed cottons.
Spent a very pleasant couple of hours or so yesterday printing these fabrics. I started out just getting some ready to add to a quilt I am putting together. As usual, didn't know when to stop. These are mostly commercial thermofax prints. The floral design is a lovely wooden block which I bought from Art Van Go.
Quilt pieces placed before stitching starts
The photo above shows the quilt I am currently working on - most of the fabrics shown above are from Tracy Fox, The plain black, red and cream are from Ikea. The funny little "aliens" are my own dyed fabrics cut out and ready to be bondawebbed in place. The working title for this one is "African Crosses". The shapes come from a workshop I went to back in 2010 with Magie Relph. She had brought some gorgeous Tuareg and Ethiopean crosses for us to sketch. Such a delightful day spent in good company. I intend to use some of the engraved detail as inspiration for the quilting.

Did I say that there were a number of projects on the go at once? I have also cut out three dressmaking projects. The first will be this pinafore dress.

Vintage pattern from 1983

Pinafore dress waiting to be assembled
The other two projects use the same pattern - Hotpatterns HP 1052 Classix Nouveau Great White Shirt. I last made this design here. Sadly, the pattern now seems to be out of print.


Another Hotpatterns shirt - this time using some Liberty-type fabric.

Yet another Hotpatterns shirt - using up some chambray.
I use the three shirts I have already made such a lot. Such a very useful, classic, shape. You can see my first two attempts here and here.

A ribbon weaving sample waiting to be made up into a pin cushion.
This is one of those UFOs which should have been finished ages ago. I need an extra pincushion too! All I need to do is to stitch around where I have already marked and stuff it. So silly not to have finished it already.


My current knitting project - a waistcoat.
Lastly, I have made a start on the cabled waistcoat I mentioned last time. I'm not altogether sure I have enough yarn, so I'm hoping #I have enough. If not, I may have to redo the back without the cables. We shall see. I am enjoying knitting cables for a change.

Monday, October 05, 2015

A busy few weeks

Papers completed
The past few weeks since I last posted here have been extremely busy. The "Doghouse" is now ready for the next stage - the roof is complete and it now just needs the benching and flooring inside. This will have to wait for another spell of really good weather.

Last time you may have seen the photos of preparations for making papers for a book. I have completed a number of these pages now and just need to cut them to a suitable size. I'm looking forward to using them. Each of the dyed papers are backed onto brown paper using bondaweb. This workshop will not take place until November so I am rather ahead of myself with this. Yes, it does make a change......

Prefelts
I've been to a couple of workshops. The first of these was with Lesley King and we made prefelts. I have since spent the best part of a further couple of days making prefelts. I still have such a lot to learn about feltmaking.

Alice Fox workshop samples
The second workshop was with Alice Fox and here we made a variety of samples using stitch in an experimental way with found objects. I took along a range of slivers of wood recovered form the making of the Doghouse as well as nails which hadn't formed properly and other bits and pieces. This was a really interesting workshop and I bought Alice's book which she very kindly signed for me.

printing in progress
I also spent a couple of days printing - using my thermofaxes, gelliplate and also my wooden and lino print blocks. A lot of fun was had doing this and I have quite a few newly printed pieces ready to use.
Freshly printed fabrics drying


Monday, October 13, 2014

A workshop with Gillian Travis

My first piece.
This weekend has been a really special one for me. On Sunday, I was lucky enough to attend a workshop with Gillian Travis. I really admire Gillian's work, since she is a prolific quilter and an excellent teacher.The previous day, she had been giving a talk to the Quilters' Guild Region 13 Regional Day held in Frodsham. She gave a really interesting talk and showed us a very wide range of her work, whilst talking about her travels. The afternoon speaker was Val Jackson who showed her amazing work.

On the Sunday, Gillian showed us several techniques to build up a background fabric. She showed us how to make a wash using acrylic paints, and then using stencils and blocks to build up a texture. Then adding a thermofax print. Some people reading this will feel that this all sounds rather familiar. I must say that, although I have often used these techniques before, I learnt a huge amount from Gillian. I had never used acrylic paints before, preferring to use fabric paints. However, I have now changed my mind and will be using acrylics in future.

The second piece
I used some of my own stencils, learning the best way to apply the paint. I was so pleased with the results and will be investing in a couple of stencil brushes and also some little sponge dabbers that we were able to try.
My second and third pieces still need a lot of work, but I had such a lot of fun putting them together. The original fabric was an off-white stiff calico (muslin). 

My last, just started piece
Today has been spent trying to catch up with my emails, so there has not been any time to spare for playing around with textiles in my workroom and I still haven't managed to put all the workshop stuff away. Never mind, there is always tomorrow. I did manage to get a fair bit of planning done taking Ella for a long walk. I always seem to be able to get thing settled down in my head when I am off on a long walk...........


Hendred Hat by Elly Doyle
I did manage to get a cosy hat finished on Sunday evening, just in time for a rather chilly walk with Ella this morning. It really kept my ears cosy, just what I'd wanted. This hat can be found here and is also in the Scrumptious Collection Volume One from Fyberspates.

I still had some of the cosy yarn left over, but didn't want to make the mittens that match the hat since I never wear mittens. So, I decided to make a cowl or a scarf. In the end, I decided to try to design my own very simple scarf. So here it is:


The basic idea from my notebook.
I was going to use a cable design from one of my stitch library books. This one is excellent with lovely colour photos and clear diagrams.


The original photo of the cable design.
It is lovely working with books like this one. I know I haven't got very far yet, as you can see from the photo below this. However, I feel fairly confident that my scarf will turn out all right. Any problems with it will all be of my own making rather than the cable instructions from the book.


 Tomorrow is the day when I get to show my latest textile book to the Embroiderer's Guild meeting in Alsager. I shall have to let you know about how that goes another time.